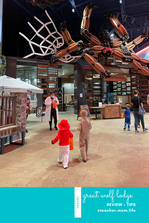
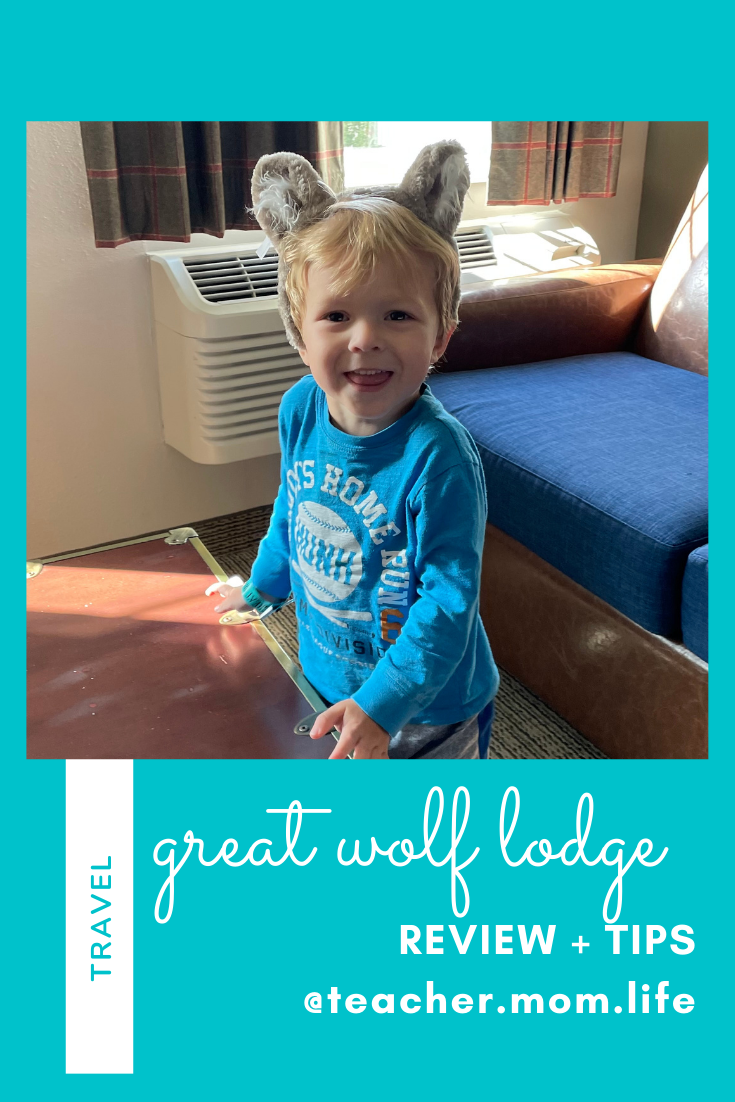
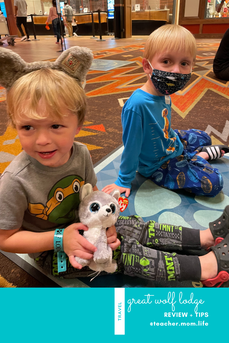
 Overall we were very pleased with our stay. The boys loved the novelty of the lodge down to every last detail. There were plenty of activities to participate in and our one night stay was jam packed. When we checked in we each got wolf ears included in our stay, the boys had bunk beds (and their own TV which they thought was a big deal) in a small section of room, and since we were there for Halloween there was trick-or-treating and other activities to participate in that were included in the cost of our stay. We also got to visit the water park both days. We went to the water park shortly after checking in and enjoyed that for a while, then we grabbed dinner at the lodge, and participated in other activities. I took our toddler to a dance party while my husband went with our 5 year old to the arcade (additional cost). Then we reunited for their short and sweet bedtime story and tucked the boys in bed. The next morning we went to the water park and stayed until everyone was exhausted. We were able to stay until closing, but our littles didn’t have the stamina and we still had a long drive home. (Please note this was our experience. Availability and cost may vary by location. Their website does a great job explaining this). Our only complaint was that the water park was a bit cold–it was October, so it was not warm outside, but our boys did shiver every time they were out of the water. This could have been something related to our specific location and it wasn’t miserable–given the chance we would still go back. Now for the logistics: We all got wristbands at check in. This acted as our room keys and was linked to our account for billing purposes. We had the option of adding these items to the boys bands which would be nice if they were older. This was so convenient and easy to use. Here are my tips:
1 Comment
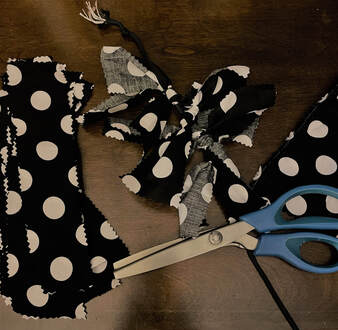
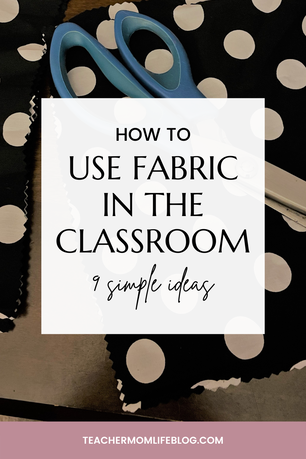 As a former fabric store employee, I have always thought using fabric in the classroom is underrated! Fabric just tends to add a softness to the classroom atmosphere and it is long lasting and easy to store! I recently got connected with FWD: Fabric Wholesale Direct and I was so excited to learn that now I can purchase my fabric online and get it shipped to my house, which is a huge bonus when I'm working late and everyone has practice. To share my love for fabric I wanted to share 9 simple ideas for using fabric in the classroom and a simple tutorial for my favorite garland! 1. Classroom decorations - As mentioned above, I love the soft, comforting touch that fabric adds to the classroom. I used a sheer organza to make the canopy on my book nook! My scholars love the sparkly stars. 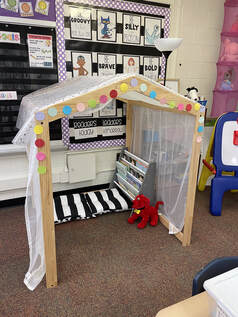 2. Erasers for dry erase boards - This was the easier project I've completed in a while! I bought one yard of terry cloth, cut little squares with my pinking shears and my class has erasers for their dry erase boards--erasers I can afford to be lost or damaged. 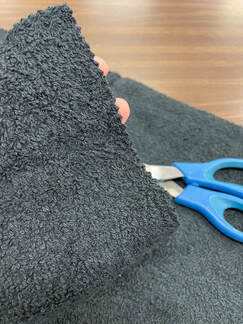 3. Bulletin board background - Forget the paper! Put up fabric for your bulletin boards! It is easier to store year after year, doesn't look damaged from staplers, and doesn't fade as quickly My sons helped me put this awesome bulletin board afternoon this week. Cotton prints are my favorite! Pro tip: stretch the fabric out with push pins if you're working alone. That makes it a lot easier to staple up! 4. Reupholster furniture - Teachers love two things, themes and thrifting. Make your chairs or pillows match your aesthetic by throwing on some themed fabric! 5. Transform your classroom - When we're digging deep into a theme, I like to throw a tablecloth on my kidney bean table! Since we live near Speedway, Indiana I got this checked fabric for our Indy 500 unit in May! We are going to be setting the scene! 6. Learning the sense of touch - Every year we dive deep into the 5 senses. Collecting different fabric samples is a great way to teach different textures! 7. Spirit week gear - Need some spirit week gear? Make a headband or hairbow with a scrap of cotton! Easy peasy! It's also an affordable way to share some school spirit and get all of your students in school colors. Give them a little strip to tie on their arm, in their hair, etc... It doesn't have to be fancy or sewn, it just needs to last a day! 8. Music and movement - Obviously you could use fabric for arts and crafts, but scarves and long strips of organza or taffeta are great tools for a quick dance break if you need some movement in your day! A great way to engage primary minds! 9. Garlands, garlands, garlands! - This garland is my favorite to make for my Christmas tree, so I thought why not try it on a bulletin board! You can cut longer strips if you want it to hand to put it on places such as your desk or just short strips if you want it to be spunky I used the short and spunky approach for the bulletin board below. Then I made my oldest son pose with it to his dismay! 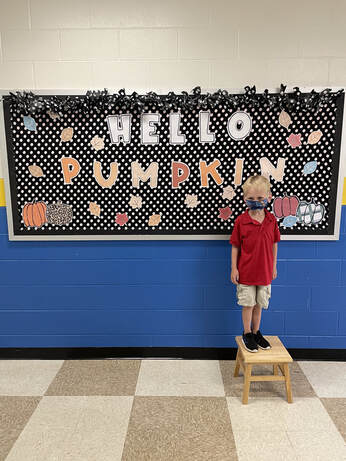 See the steps to make your own below! Make your Own Garland!
•Students need a safe learning space where they know what is expected of them instead of a long list of things they can't do.
•Students need learning opportunities that are developmentally appropriate and teach more than what one can find on a test such has how to be a kind, motivated human. •Students need structure and repetition to learn. •Students not only need information and knowledge, but also the skills needed to be lifelong learners. •Students need Maslow before Bloom’s. •Students do not need the latest buzz words, but instead a teacher that is a purposeful, reflective, life long learner. •Students need adults that put effort into helping them build positive self-esteem and identity. •Parents have a right to know what is being taught in schools. •Parents have a right to ask for resources and assistance with learning at home without fear of being judged. •My objective as a teacher is to provide my students with the intellectual skills to analyze the world around them and invoke a joy and comfort for coming to school.
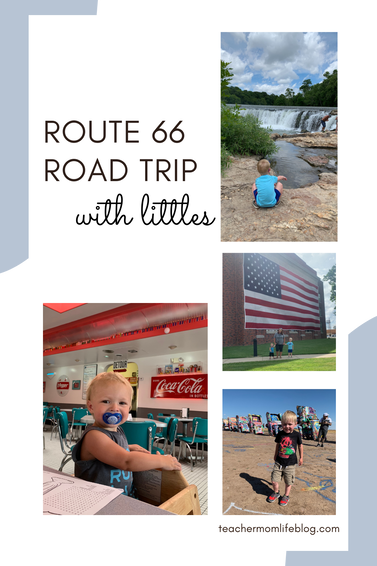
My husband responded by saying ‘lets do it!’ I asked him when and he shrugged and replied “why not now?” It was true. We would never have the gift of time with nothing else to do again! He went to get my oil changed and cleaned up my car while I packed for everyone. It was almost an adrenaline rush deciding such a thing on a whim! I am going to share my favorite parts of the trip below, but I swear the best part was that we didn’t plan our trip! We took off and followed the road. Each night we made a list of things we might want to check out while we go, but the best part was being in the moment. If we saw a roadside attraction we went. This trip was unscripted and unplanned! We decided we’d see how far out we could get in five days and then head back home. We knew this wouldn’t get us to California, but we had a budget here! And no matter what we accomplished it would be better than sitting at home!
We got started by cutting over to Norther Illinois from our home in Indianapolis. Our first Route 66 stop was Fanning Outpost General Store in Cuba, Missouri where we took a picture at the World’s Largest Rocking Chair and got our bottled soda for the road. They recommended that we stay at the Munger Moss Motel, so that was our plan! After the Munger Moss, we just stayed in chain hotels (we tended to prefer the Hampton Inn—it was mid-priced and very clean). The Munger Moss was built in 1946 and was not fancy—but it was clean and fit the vibe of a true Route 66 trip! From there we planned our other stops along the way! Here is our list of attractions and stops from East to West! They’re simple, cheap and sometimes gimmicky, but still so fun! Our boys don’t use tech in the car, so they just took in the sights and played on their mini magnadoodles most of the drive. They were 4 and 1.5 at the time and loved it! Missouri
Oklahoma
Texas
New Mexico New Mexico was the last leg of our trip! We could have ventured on to Arizona and California, but we set a goal for the number of days we’d drive out before turning around!
On the trip home we decided to take a different route. We stopped in Waco at Magnolia (okay, we drove by and went to The Little Shop on Bosque to avoid the crowds) and the Mt. Carmel Center (to learn more about the Waco Massacre and pay our respects). Then we stopped by Southfork Ranch because my husband has always been a huge Dallas fan. Overall it was an amazing trip and I have zero regrets about just hitting the road without planning! It was a true roadtrip and our son talks about it often! I’ll post travel tips, soon! 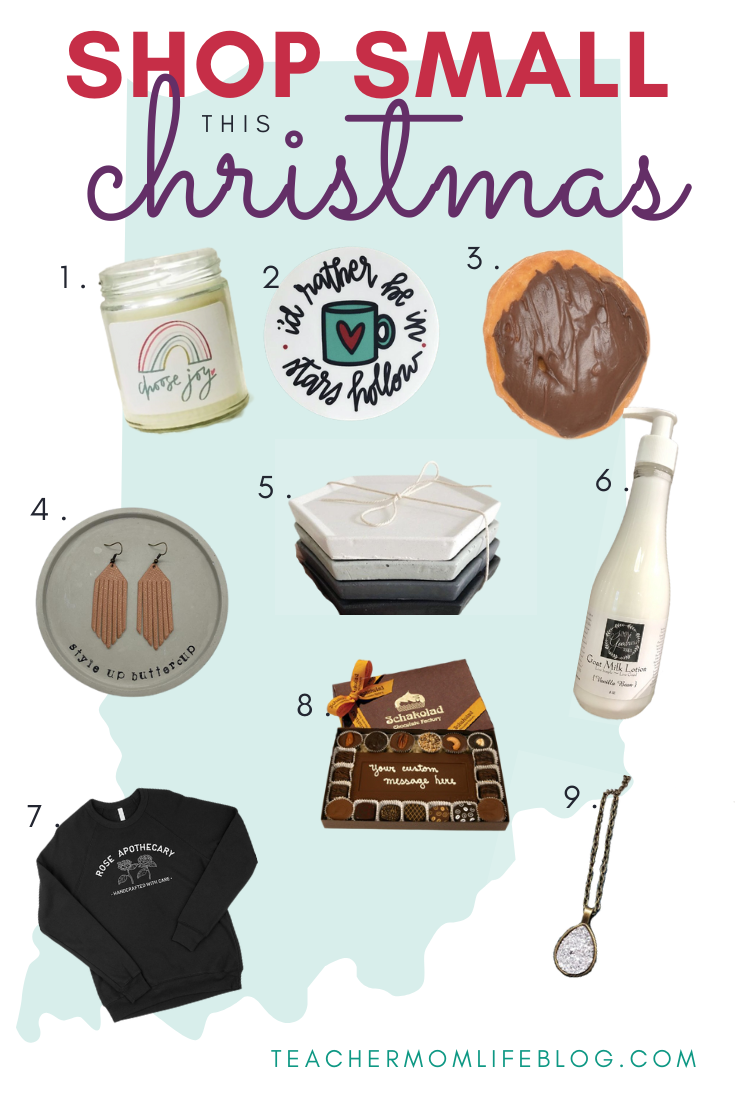 This year more than ever it matters that we remember our small, local businesses this holiday season. As a former boutique owner myself, I know that it takes your community to keep you going. Here are nine of my favorite small, Indiana based businesses and my favorite Christmas gift ideas from each one!
1. Abboo Candle Company - Abboo's clean burning soy candles are my favorite! They burn so well, are hand poured with love by a momma of two, and the neutral colored wax matches any space you want to put your candles in. Use code TEACHERMOMLIFE for 15% off! 2. Imy's Joy - Sarah is a mom and Indiana-based maker that handletters most of her unique items from shirts, stickers, signs, and bags her items are uplifting and positive little pieces of happiness! 3. Jack's Donuts - I am telling you these are the best donuts around and I love their family even more! Find a location near you, get some swag, a gift card or just leave donuts at someone's doorstep this season. Their iced Bavarian cream, pictured above, is my favorite, just ahead of their tiger tail donut holes. 4. Style Up Buttercup - Claire, a Purdue freshman, handmakes her spunky earrings to help her finance her first year at college. She is a sweet young lady that creates beautiful, lightweight jewelry. 5. Cream & Concrete - This collection is simple, sophisticated beauty. I have been eyeing these coasters for over a year and I am so glad I finally got my hands on a set. 6. Simple Goodness Soaps - I found these soaps and lotions at a local market, and they have become my fast favorite. When I was pregnant with both of my boys it was the only product that soothed my sensitive skin. Add in their amazing scents and I am sold on this Elwood based store. Blackberry is my new favorite. 7. United State of Indiana - I have been a longtime fan of USI, but this sweatshirt is my favorite. I adore Schitt's Creek and it is some comfortable. In fact, I get compliments every time I wear it in public. 8. Schakolad Chocolate - I met the owners of Indy's Westside location at a market and I was so impressed with how kind they were. Soon after I went in to gift a friend her favorite wine dipped in chocolate. The detail and time they put into making it perfect has made me a huge fan. For Christmas I asked my husband to make a trip here for my gift! 9. Spiffy and Splendid - Located in Noblesville, IN, this maker is one I hunt down at all the local markets. Her druzzy earrings are lightweight and so pretty. This necklace is such a fun accessory for anyone on your holiday shopping list! Even if you're not a Hoosier, many of these items can be mailed to you! Small business, BIG LOVE! 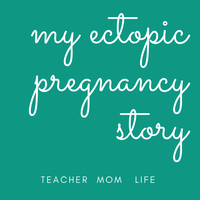 A year of loss… Three years ago I was pregnant for the fourth time in six months. Those six months of losses followed nearly a year of trying to conceive. However, I was there. I was chugging along and made it past five weeks (before you ask, I always got positives a week before my missed period and I was notorious for low progesterone. This cycle caused me to be a crazy test-driven person). So here I was claiming to avoid wine because I was driving for my husband, keeping my secret, and in pain. Pain I didn’t allow myself to believe. Pain that caused me to hide on a bench at the front of the store while my cousins finished Black Friday Shopping. Pain that kept telling myself was just discomfort. Pain that made me afraid to tell anyone I was pregnant. But, despite no bleeding, my HCG levels stopped growing appropriately. I started a routine of 1-hour blood tests every other day. And every other day my HCG Levels were growing, but nowhere near doubling. I became obsessed with searching the internet for a success story. Just one woman's baby story I could find to give myself hope. What was worse is that I knew it wasn't good and kept telling myself to be prepared for a bad outcome, but somewhere deep inside me I couldn't let go. I couldn't stop hoping there was some tiny miracle inside of me. Blood test after blood test I was going up a bit. Enough to toy with my emotions. HCG Levels 11/21 10 11/22 23 11/25 75 11/28 92 11/30 105 12/4 368 12/6 529 Throughout this were empty ultrasounds--they kept telling me it was probably too early to see the baby, but I've seen babies and sacks at least this early on before. The process was excruciating. Maybe it was just gas? The poor tech kept asking me if it hurt and I swore it was just a little discomfort. I was in complete denial. 12/11 169 Down. Finally a reason to let go of hope. After weeks of this pattern my HCG level dropped and it was time to make the call...my pregnancy was ectopic. I would go for an appointment and I was to contact on-call if I had severe pain. The thing is, I finally acknowledged the pain--physical and mental. It was all excruciating. I was feeling freely for the first time in weeks. I didn’t know how to deal. I stayed up all night afraid I should call to go in. I made it through the night and to my OBGYN appointment. The nurse gave me a long speech and I remember none of it except that she kept repeating “this can’t be happening after all your other losses. Now we know how to keep you pregnant.” I remember forcing a smile and trying to reassure her that I was okay. Why? So now it was time for the next steps. I was sent to the fifth floor and given two simultaneous shots of methotrexate. I was told it would basically dissolve the pregnancy by stopping the cell growth. It was an incredibly long needle, but the nurses reassured me it oddly didn’t hurt much. It didn’t. Oddly that was frustrating. I needed it to hurt. I needed it to be an event. I needed to know it happened. After I had to stay in bed for 45 minutes to make sure I didn’t have an adverse reaction and then it was life as normal...with the exception of no drinking for two weeks to give my liver a break from the process... 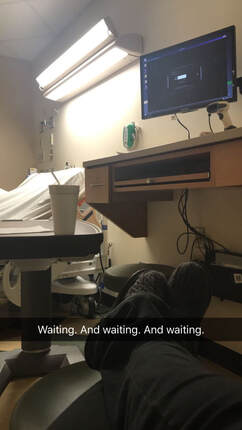 It was as if nothing happened. I could have gone to work the next day. Nothing. I couldn’t celebrate Christmas that year. I didn’t want to be around friends or volunteer. Just like that my baby dissolved into nothing. I had been there before. I had two miscarriages before my oldest and three that summer. This felt like more nothing than ever before. I’ve learned with time that each loss is so different...I’ve had some that shook me to my core, some that I felt guilt for feeling too numb to face, and others that I just kept pushing through. The one thing I would tell anyone facing loses and just let yourself be. If you want to wallow and be grumpy--do it. If you want to make a to do list of how to try again--you go girl. Don’t worry about how you should feel...just face how you do feel the best you can so maybe someday you can learn how to live with it. There is no right way to grieve.
With time we decided three months later to try one more time. That was it. That was more than we had in us and it stuck. It’s bittersweet knowing that if that pregnancy worked out I wouldn’t have my sweet baby D. I can’t imagine a world without his feral smiles. I’m thankful that our journey ended in two beautiful boys. I know that is a privilege that not all get. I do my best to cherish even the hard days because we worked so hard to get here. This is our parenthood journey. 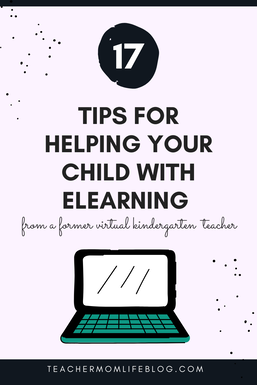 eLearning is back or here to stay for so many families. It is hard, it can be frustrating, and sometimes it can be the least of your worries. Teachers and parents are all asking one thing: how do we make this work? Sadly I do not have a magic wand, but I do have 12 years experience in virtual education and I am now at school where we are in the heart of eLearning. Virtual education is very different than eLearning in many ways (online school programs, resources sent to homes for families, everyone has the tools they need, platforms designed for parents to the teacher, and so much more), but the tips for success cross over between both. Here is my list of tips for helping your child navigate eLearning.
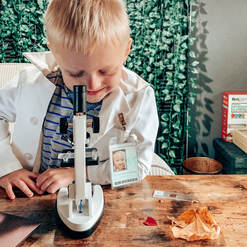
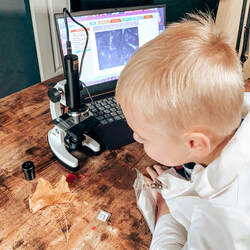
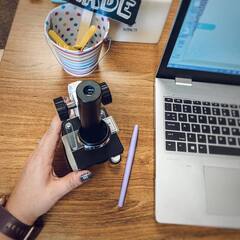
We cannot create observers by saying 'observe', but by giving them the power and the means for this observation and these means are procured through education of the senses. – Dr. Maria Montessori 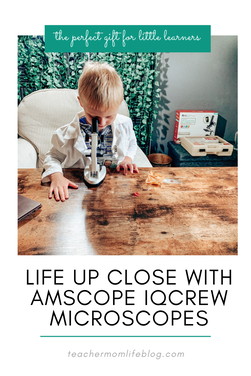 Lately, my favorite tiny humans and I have been exploring life up close with the IQCREW by AmScope 120X – 1200X Kid’s 85+ piece Premium Microscope, Color Camera and Interactive Kid’s Friendly Software. Thankfully, the kit comes in a carrying case so I can bring it between school and home. My favorite part of this microscope is that while it is geared towards kids, it is not a toy. Instead, it is a real microscope that is kid-friendly! My sons and students get real-life experience with high-quality science equipment. It makes my inner Montessori-loving, early childhood educator side so happy! At home, my son enjoys putting on his lab coat and viewing samples through the eyepiece. He may be only four, but he has already mastered switching out AmScope’s pre-created slides and looking at the slides we have created together. In fact, when we start eLearning at home next week, I plan to let him explore the brine shrimp hatchery for his science time. He has been talking about our upcoming experiment nonstop.
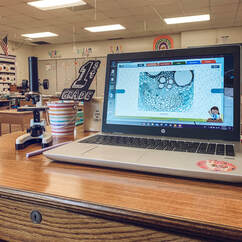
At school, my students have gotten to make firsthand observations of the microscopic world through the full color digital camera that replaces the eyepiece tube and connects to my computer. I can project it to my class and everyone can participate safely. With the editing tools, we can put notes on an image, crop it, add stamps and save selections or whole images to revisit later. As we transition to eLearning, I plan to app share the software to continue fostering my firsties’ love for science. When students are excited about learning, you don’t want to lose momentum—and it can be a great tool to make them want to come to live classes. That’s right, I am going to reward them by more learning. Win-win! Overall, it has been a magical learning tool disguised as a toy! The full product description with a list of all items included in the kit can be found on AmScope’s website. The AmScope Kids Premium Microscope is available for purchase directly on the website.
Friends, I did it. After not coloring my hair since August in 2019, I decided to color my hair again. It was growing out and much healthier than it was before, but I didn't like the uneven color. Now my new goal is to take better care of my hair and I have pledged to invest in better color and stick to one color so I can just updated my roots as it grows out. However, I'm going to confess something that has made many stylists in my life post rants upon rants on Facebook: I color my hair at home. I don't have the time or money to see a stylist. I respect stylists---they're professionals and do great at their job. They also have better hair than me and higher hair expectations than I do. Shrugs. I know I get out what I put in. If this is the reason I'm not a model so be it. So given that disclaimer...below are real, everyday results from my average self.
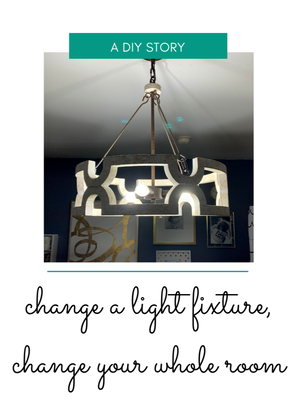
Confession: Changing a light fixture to update a room never crossed my mind as a task I was willing to take on. It seemed to tick two boxes that landed it on my Nope List: complicated and expensive. Then I fell in love with LNC Home Farmhouse Chandeliers and I just knew I had to find a way to make this happen; so I did the first thing I always do when I am about to take on a big goal: I asked my husband to give me a push. Did he think I could do it? Would he be willing to help only if I really needed it? Would he still love me if I messed up and caused us to lose electricity throughout the whole house (I now know that is not really a risk one takes when replacing a ceiling light, but I still had to quiet my rational and irrational fears). And just as I expected him to do, and part of the reason why I asked him in the first place, he gave me that nudge I needed to click Add to Cart.
Now I have not one, but two new light fixtures in my house. Both lights in my kitchen needed to match after all! You can click here to read about my first adventure. If you follow me close enough to read this blog you know that I am an average midwestern, teacher mom and I do not specialize in DIYs and home makeover. Basically, if I can do it after 30 minutes on Pinterest and YouTube, you can do it, too! The hardest part of installing the newest light (since I figured out how to purchase light bulbs with the first one) was reaching the fixture comfortably to do the install. If my ladder had one more step I would have been golden, but alas I have three ladders, two are too tall and one is too short. (insert something witty about Goldilocks here-ha!) Forty-five minutes and a few times yelling for my husband to grab something I dropped later I had installed my second light fixture in my dinning room/office area. I honestly cannot get over the amount of character these light fixtures have added to this area. It has been an affordable, simple DIY that has totally transformed our space. Our home and space may be tiny and littered with toys, but that has not stopped us from making our starter home a beautiful space we are proud of while we save up for our dream home. I know in the world of Instagram it is different to have a decor account without the dream home everyone aspires to own, but my hope is to inspire others to make whatever space and budget they have dreamy. As you can see in our mini reel home tour we have taken atypical approaches to how we use our space and we have to be intentional about every square foot as we have none to spare. However, inside this space is exactly what we need to have a life we love. We have big dreams, but we are also satisfied. 
|
What you're in for...Here you will find my ramblings of motherhood, teaching, & life while like many I try to balance it all. As an Amazon Associate I earn a small amount from qualifying purchases, but it does not cost you any more! :)
Archives
February 2022
Categories
All
|


 RSS Feed
